

How to Plant and Care for Garden Mums
Every September the same thing happens. A pot of mums comes home from the store, looks spectacular for three weeks, and then you're standing over it wondering whether it can go in the ground. Sometimes it can. Often it can't, and the reason has little to do with your skill. It comes down to which kind of mum you bought and how early you plant it.
Garden mums, the hardy kind, are genuine perennials. Planted well, they re-sprout every spring and bloom in late summer and fall, right when most borders are running out of steam. This guide covers how to tell a perennial mum from a one-season display plant, when planting works and when it's a gamble, and the care routine that keeps a mum compact, full of flowers and alive through winter.
The short version
Buy a named hardy cultivar, plant it in full sun with soil that drains well, and give fall-planted mums at least six weeks of root-growing weather before your first frost. Spring planting is more dependable. Pinch young plants until early July, keep the soil evenly moist, leave the old stems standing over winter, and mulch loosely. A generic grocery-store mum planted in late fall is a gamble, however nice it looks.
What you'll learn
- How to tell garden mums from florist mums before you buy
- The best planting windows, and what to do if you're past them
- Step-by-step planting, watering and feeding
- Pinching: the step that decides how full the plant looks
- How to overwinter mums and divide them in spring
Garden mums vs. florist mums
Nearly everything that goes wrong with mums traces back to this. The potted chrysanthemums stacked outside supermarkets and big-box stores in fall are usually bred for a heavy flush of color in a container, not for surviving a hard winter. Extension services in New Hampshire, Minnesota and Nebraska all make the same point: the fall-blooming mums sold late in the season have generally not been bred for cold hardiness. Hardy garden mums, by contrast, have been selected for winter survival and are typically hardy in USDA zones 5 to 9. University of Minnesota breeders have developed selections reliable down to zone 3.
| Hardy garden mum | Florist / supermarket mum | |
|---|---|---|
| Bred for | Coming back as a perennial | A dense, showy display for one season |
| Winter survival | Typically zones 5–9; some northern selections to zone 3 | Not bred for it; survival is hit or miss |
| Where you find it | Nurseries and spring plant sales, often a named cultivar | Grocery stores, big-box stores, florists, often sold by color only |
| Best use | In the ground, in a border or large container | Porch pots and seasonal color |

Before you buy a mum you hope to keep
- The tag names a cultivar, or says “hardy” or “garden mum”, rather than just a color
- A hardiness zone on the tag or the grower's website covers your zone
- In short-season northern gardens, the variety is an early bloomer (August or September), so flowers open before hard frost
- The plant is healthy, with no yellow or spotted lower leaves
A tag that only says “fall mum” tells you nothing about winter tolerance. The plant may well be hardy, but you can't know. In the UK the picture is similar: the RHS notes that most hardy chrysanthemums tolerate temperatures down to at least -5°C (23°F), though it still advises protecting them from frost.
When to plant
Spring is the most dependable time. A mum planted in spring or early summer has the whole growing season to build a root system, and it will flower hard by autumn. Several university extension offices say so outright, including Iowa State, which recommends spring planting for Iowa gardens.
Fall planting works, with conditions. Mums are shallow-rooted, so the roots need time to knit into the soil before it freezes. Nebraska Extension suggests at least six weeks of good growing weather after planting, and University of Illinois Extension also points to about six weeks before the first frost. Count back six weeks from your average first-frost date and you have your deadline.
| Planting time | How reliable | What to expect |
|---|---|---|
| Spring to early summer | Best | Roots establish before the first bloom season. Plants flower fully their first fall. |
| Late summer to early fall, with six or more weeks before first frost | Good for hardy cultivars | Second-best window. Water well and mulch. |
| Late fall, less than six weeks before frost | Risky | Roots often don't settle in time, and winter losses are common in cold climates. |

If you're past the window
In the UK, mature hardy chrysanthemums already in flower are also sold in late summer and early autumn, which is a quick way to fill a gap in a border.
Choosing the spot
Sun. Mums want full sun. In shade they stretch, flower late and flop.
Drainage. This is the one that catches people. Growers who sell hardy mums say winter wet kills more plants than cold does. Soil that stays soggy around the crown from late fall through early spring is where mums disappear. If your bed holds water, plant on a slight mound or fold in compost to loosen it, or choose another bed.
Space. Allow 15 to 24 inches between plants. It looks generous the day you plant and tight by September, which is how it should be, since tight clumps hold each other up. Cramming them closer invites mildew and weak stems.
How to plant, step by step
- Water the pot first.A dry root ball is hard to rewet once it's in the ground. Soak the pot and let it drain.
- Improve the soil.Dig the planting area over and mix in compost for nutrients and better drainage.
- Loosen the roots.Slide the plant out and tease apart any tight, circling roots with your fingers.
- Plant at the same depth it was growing.Iowa State's guidance is to match the pot depth. Burying the crown deeper invites rot.
- Firm the soil and level the surface.Fill any dips around the plant that could collect water.
- Water thoroughly.Soak until the soil settles around the roots. With a fall planting, keep watering through the weeks before frost, because roots are still building.
- Add a thin layer of mulch.About two inches helps hold moisture. Keep it from piling against the stems.

Watering and feeding
Mums have shallow, fibrous roots, so they dry out faster than you'd expect, especially in a hot, dry spell or in a pot. Aim for steady moisture rather than cycles of drought and flood. Water at the base where you can: wet foliage encourages fungal problems, and the RHS lists powdery mildew among the diseases mums are prone to.
A soaker hose does the base-watering job without any effort. Laid in a loop through a bed of mums and covered with mulch, it puts water where the roots are and keeps leaves dry.

Gilmour Flat Weeper Soaker Hose, 25 ft
One suitable option for a small mum bed. The flat, flexible 5/8-inch hose lays out easily between plants and releases water slowly at soil level. Connect it to a tap timer and you can stop thinking about it. Best for beds of several plants rather than a single pot.
View on Amazon →For feeding, a slow-release fertilizer is the low-effort route. Iowa State recommends it for garden mums, applied as growth gets going in spring. Kentucky Extension, which calls mums heavy feeders, also suggests a second feed in midsummer. Stop feeding by late summer. Pushing soft new growth just before frost doesn't help the plant.

Osmocote Smart-Release Plant Food, Flower & Vegetable
A balanced controlled-release granule listed for perennials and flowers. The granules release nutrients over a period of months, so one spring application replaces regular liquid feeding. Check the package for the rate per square foot and scatter it around the plant, not against the stems.
View on Amazon →Want fall color planned alongside the rest of your year? The Flower Garden Planner has a bloom calendar with a gap finder, six color palettes and layout grids in a 62-page printable.
See the planner →Pinching and deadheading
Left alone, a mum grows a few tall stems with flowers only at the tips. Pinching is what turns it into a dense mound. You remove the growing tip, and the plant answers by branching below the cut. More branches means more places for flower buds to form.
There's a second reason. Mums are short-day plants: they set flower buds as days shorten in late summer. Pinching keeps them growing leafy shoots through the long days of early summer, then stops before buds form so the plant blooms in fall rather than July.
| When | What to do |
|---|---|
| New growth is 6–10 in. (about 20 cm) tall | Pinch out the growing tip. Extension advice varies from the top half inch to the top two or three inches. Either works, as long as the tip comes off. |
| Side shoots reach about 6 in. | Pinch those tips too. Repeat as shoots lengthen. |
| Early July in most of the US | Make the last pinch. Iowa State says continue until early July, and University of Illinois Extension notes many gardeners make the final pinch around July 4. Wisconsin Extension suggests stopping earlier for early-blooming types. |
| After that | Stop. Buds are forming, and pinching now delays or removes flowers. |

Gardensted tip
A mum you buy already budded in fall is past pinching. Leave the buds alone and simply remove spent flowers as they fade. Pinching starts the following spring.
You can pinch with your fingers on soft growth, but a sharp pair of snips is cleaner and quicker once stems toughen, and the same tool handles deadheading later. Wear gloves: the RHS lists chrysanthemums as a skin allergen.

Fiskars Micro-Tip Pruning Snips, 6 in.
One suitable option for pinching and deadheading. Slim bypass blades reach into a crowded clump and cut cleanly right to the tip, and a spring opens them after each cut, which saves your hand over a long session. Best for light stems, not woody growth.
View on Amazon →Common problems
| What you see | Likely cause | What to do |
|---|---|---|
| Tall, floppy stems with few flowers | Never pinched, or too little sun | Pinch next spring and move to a sunnier spot if needed |
| Late or sparse bloom | Pinched too late, or shade | Make the last pinch by early July; keep to full sun |
| Plant gone in spring | Winter wet, poor drainage, temperature swings, or a non-hardy type | Improve drainage, mulch loosely, and choose a named hardy cultivar |
| Bare, dying center of the clump | The plant has outgrown itself | Divide it (see spring care below) |
| White coating on leaves | Powdery mildew | Water at the base, give plants space, remove badly affected leaves |
| Sticky, curled growth or leaf tunnels | Aphids or chrysanthemum leaf miner (both listed by the RHS) | Check leaf undersides early; remove affected leaves and wash off aphids with a jet of water |
Getting mums through winter
This is where gardeners disagree, and the sources disagree too, so here is the honest picture.
In colder US regions, Iowa State and the University of New Hampshire both advise leaving the old stems standing through winter instead of cutting them down in fall. New Hampshire notes that mums are much more likely to survive when the dead stems stay until spring, and the standing growth likely gives the crown a little insulation. Kentucky Extension, in a milder climate, recommends cutting back to the ground and mulching. In the UK, the usual practice after flowering is to cut stems down to about 20 cm (8 in.) and leave that low stool through winter.
Where the sources agree is mulch and drainage. Apply a loose layer once the ground has cooled in late fall, two to four inches of something airy such as straw or coarse bark. Heavy, matted mulch that stays wet works against you. Remove it in spring as new growth appears.

Watch the buds
Late-blooming mums can lose their flowers to an early hard frost, even when the plant itself is perfectly hardy. A lightweight cover on the coldest nights is worth the effort. For a full rundown of covers and timing, see our guide on how to protect your garden from the first frost.

Agfabric Plant Cover Frost Blanket, 0.9 oz
One suitable option for covering budded mums on a frosty night. It's a lightweight, breathable fabric that goes over the plants in the evening and comes off in the morning. It protects against a light frost, not a hard freeze. Choose a size that drapes over the clump without being pinned tight to the flowers.
View on Amazon →Mums in containers are more exposed than mums in the ground, because the roots sit in a small volume of soil above ground. Move the pot against a sheltered wall for winter, and make sure the drainage holes don't get blocked by ice or standing water.
Spring care and dividing
Once new shoots appear at the base, pull back the mulch and cut away last year's dead stems. Feed, then start your pinching routine when growth hits the 6-inch mark.
Every few years the center of a clump tends to die out, leaving a ring of growth with a bare middle. That's your signal to divide. Lift the clump in spring, discard the old woody center, and cut the vigorous outer growth into sections. Replant the divisions at the original depth and water them in. The RHS also lists division in May as a standard way to propagate. You end up with free plants and a younger, better-flowering clump.
What to plant alongside mums
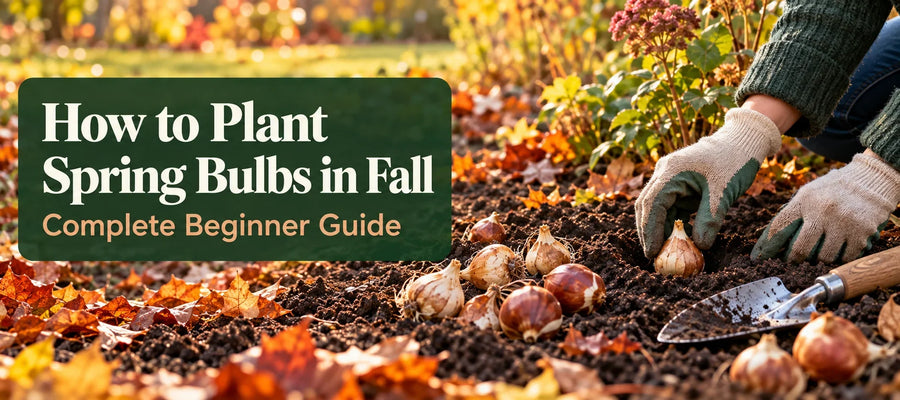
Mums look best with plants that peak at the same time or carry the show before and after. Asters, sedums and ornamental grasses all suit them, and the seed heads and stems of the grasses and sedums stay standing through winter alongside the mum stems. For more combinations, browse our flower garden ideas, and if you want winter structure in the same bed, see our winter garden ideas. When mums finish, the same bed is ready for spring bulbs planted in fall.

Mistakes to avoid
- Assuming every mum is a perennial. Check the tag for a hardy cultivar.
- Planting in late fall and expecting a sure thing. Roots need about six weeks.
- Planting in heavy, wet soil. Winter wet is the main killer.
- Skipping the pinch. Without it, you get tall, thin, floppy plants.
- Pinching too late. After early July you're removing flower buds.
- Burying the crown. Match the original pot depth.
- Smothering the plant in heavy mulch. Keep it loose and thin enough to dry out.
Products mentioned
| Product | Best for | Why it fits | Key feature | Link |
|---|---|---|---|---|
| Gilmour Flat Weeper Soaker Hose, 25 ft | Steady watering at the base | Shallow roots like even moisture; dry leaves help limit mildew | Flat, flexible, weeps at soil level | View on Amazon |
| Osmocote Smart-Release Plant Food, Flower & Vegetable | One-time spring feeding | Slow-release feeding for perennials | Controlled-release granules | View on Amazon |
| Fiskars Micro-Tip Pruning Snips, 6 in. | Pinching and deadheading | Clean cuts in a crowded clump | Micro-tip bypass blades | View on Amazon |
| Agfabric Plant Cover Frost Blanket, 0.9 oz | Covering buds on frosty nights | Protects flowers from a light frost | Lightweight, breathable fabric | View on Amazon |
The takeaway
Garden mums come back when you start with a hardy cultivar, plant in full sun and well-drained soil, and give the roots time. Pinch in spring, water at the base, mulch loosely, and leave the old stems alone through winter in colder regions. The pot you bought on impulse may or may not make it. A mum you plan for has far better odds.
Plan your own flower garden, bloom by bloom
Mums carry the autumn; the rest of the year needs a plan too. The Flower Garden Planner helps you map what blooms when, so your beds don't go quiet after the mums fade.
- A bloom calendar with a gap finder
- Six color palettes to choose from
- Layout grids and monthly care checklists


62-page printable PDF, instant download. US Letter; set to Fit to page when printing on A4.
Sources: Iowa State University Extension; Virginia Cooperative Extension; University of Minnesota Extension; University of Nebraska–Lincoln Extension; University of Illinois Extension; University of New Hampshire Extension; University of Wisconsin Extension; University of Kentucky Extension; Royal Horticultural Society.



0 comments