

The idea behind no-till gardening is simple: stop turning the soil over, feed it from the surface, and let worms, roots and fungi do the loosening. The shopping side is less simple. Garden centers and online stores sell dozens of "soil health" products, and only a handful of them earn their place in a no-till bed.
This guide explains how no-till works, what it asks of you, and which products are worth buying, which are optional, and which extension researchers say you can usually skip. It is written for US and UK gardeners, with the timing notes that matter in October, when fall is the easiest season to start.
What You'll Learn
- What no-till and no-dig actually mean, and what you still have to do
- The real trade-offs: slower spring warming, mulch habitats for pests, and the cost of material
- Which soil products are worth buying, which are situational, and which to skip
- How to test your soil first, and how often to retest
- How to start a no-till bed this fall with cardboard, compost and mulch
- Where cover crops and a few hand tools fit in
The Short Version
You need three things for no-till: a soil test, a source of compost or other organic mulch, and patience. Cardboard and mulch are the cheapest way to smother weeds and start a bed. Compost feeds the soil, mulch protects it, and fertilizer only supplies specific nutrients, so they do different jobs.
Bagged mycorrhizal inoculants are usually unnecessary in an established garden, according to several university extension services. Spend that money on compost and a soil test instead.
What No-Till Really Means
The Royal Horticultural Society defines the no-dig method as avoiding breaking up, lifting or turning the soil, in contrast to digging, forking and rotavating. In the US the same approach is usually called no-till. Oregon State University Extension explains the reasoning: tilling compacts soil, destroys the air and water pores in it, and can increase runoff, erosion and surface crusting. It also disturbs the microorganisms clustered around roots, which feed on organic matter and release plant nutrients while producing substances that bind soil particles into stable aggregates.

In practice, no-till gardening comes down to four habits:
- Do not turn the soil. Plant into holes or rows through the surface layer instead.
- Keep the soil covered. OSU recommends year-round cover with straw, compost, aged livestock manure, dried leaves or grass clippings.
- Feed from the top. Compost spread on the surface is carried down by worms and water.
- Stay off the beds. University of Nebraska-Lincoln Extension advises beds narrow enough to plant, weed and harvest without stepping in them, since walking on soil compacts it.
One clarification: "no-dig" does not mean you never dig a hole. The RHS says it is fine to make small holes through the mulch to plant, as long as you minimize disturbance.
The Honest Trade-Offs
No-till is not magic, and the research behind it is thinner than the enthusiasm suggests. OSU Extension points out that most no-till research has focused on field crops like wheat and corn rather than home gardens. Here is what that means at home.
- It is slow. Piedmont Master Gardeners frame it as a long-term commitment rather than an instant fix. Organic matter builds over seasons.
- Spring can be cooler and seeds harder to place. OSU notes that thick mulch makes direct seeding harder and covered beds can warm more slowly. The remedy is to pull mulch back in early spring to let the sun warm the soil, then re-apply a thin layer once seedlings are up.
- Mulch shelters wildlife you may not want. UC Cooperative Extension in Napa County cautions that thick mulch can hide mice and voles, especially near food and water. A Penn State entomologist says long-term no-till fields tend to have slugs. That comment is about farm fields, so read it as a heads-up rather than a measured garden result.
- Raw materials can tie up nitrogen. UC Extension notes that straw and hay can use soil nitrogen as they break down, so compost them first or add nitrogen if you work them into the soil. On the surface the effect is milder, but it is one reason compost makes a better top layer than fresh straw alone.
- It can need a lot of material. The RHS says no-dig uses large quantities of mulch, which has an environmental cost when bought in, so making your own compost is best. If you do not have enough, do not feel you must go no-dig everywhere.
Many gardeners start with one or two beds. That keeps the cost of compost manageable and lets you see how your own soil responds before converting the whole garden.
Soil Health Products: Buy, Maybe, Skip
The shelf is crowded, so it helps to sort products by what they actually do for a no-till bed. UC Cooperative Extension offers a useful starting split: compost is a soil amendment that improves structure and feeds the soil, mulch is a surface layer that protects it and improves it as it breaks down, and fertilizer supplies a targeted dose of nutrients. One does not stand in for the other.

Worth Buying
Does a clear job in no-till
- Soil test (lab or home kit)
- Compost, if you cannot make enough
- Organic mulch: straw, leaves, clippings
- Plain cardboard for sheet mulching
Situational
Useful for particular problems
- Cover crop seed
- Targeted fertilizer, only if a test shows a need
- Lime or sulfur, only if pH is off
- Digging fork or broadfork for compacted ground
Usually Skip
Little evidence of benefit at home
- Mycorrhizal inoculants for established beds
- "Soil activator" products with no test behind them
- Shiny or printed cardboard
Why mycorrhizal inoculants are on the skip list
This is the product category where the extension advice is most consistent. UConn's Home and Garden Education Center says resident mycorrhizal fungi are already present in many established garden beds, lawns and landscapes, and that adding a commercial fungus does not necessarily improve a partnership that already works. It cites a meta-analysis that found roughly 80% of commercial inoculant treatments produced minimal or no root colonization. Colorado State University Extension reports that in controlled studies, no trace of the introduced species could be found later, and advises building healthy soil to encourage native fungi instead.
Washington State University's Linda Chalker-Scott adds that inoculants have shown plant-growth responses mainly in extremely disturbed or toxic sites, such as mine spoil or subsoil where the topsoil has been removed. A garden bed that is not in that condition is unlikely to be helped.
Compost, mulch and fertilizer in a no-till bed
Compost is the one purchase that most no-till gardeners end up making. UC Extension suggests a 2 to 3 inch layer of compost over the planting area, topped with 3 to 4 inches of organic mulch. For an existing no-till bed, the RHS recommends an annual mulch of about 5 cm (2 inches) of garden compost. University of Illinois Extension notes that organic matter can come from your own bins, from stores, or from municipal composting programs, which is often the cheapest route if one exists near you.
Bagged compost makes the most sense for a first bed, a raised bed or a top-up. For a large area it gets expensive quickly, so check local bulk or municipal options first.

Espoma Organic Land & Sea Gourmet Compost
A bagged-compost roundup from Bob Vila names this its best overall pick, which is why it is on our shortlist. It suits a small bed or a top-dressing where you want finished compost without making it yourself. Check the bag size and current listing before you buy, because the volume per bag decides how far it will go: a 2 inch layer needs about one cubic foot per six square feet.
View on Amazon →Fertilizer is a separate question. A no-till bed fed with compost often needs little extra, but a soil test is the way to find out rather than guess. UC Extension points out that fertilizer supplies specific nutrients and does not improve soil structure the way compost does.
Start With a Soil Test
Everything else is easier once you know your starting point. University extension labs agree on the basics: test your soil at least about every three years (University of Maine, UConn), or every three to five years where conditions are stable (UConn, University of Wisconsin-Extension). University of Illinois Extension adds that if you add amendments every year, as no-till gardeners do, it is worth testing more often to keep an eye on nutrients and pH.
- Fall is a good time. University of Wisconsin-Extension and University of Maryland Extension both point to fall, since any lime or amendment has time to react before spring.
- Sample properly. Wisconsin advises collecting from at least 10 random spots across the garden plot and combining them.
- Ask for organic matter. Illinois Extension suggests getting the organic matter percentage if the lab offers it. Targets quoted by different sources vary, and Illinois cites 3 to 5 percent.
- Use the same lab each time, because labs use different methods, which makes results from different labs hard to compare.
A mailed lab test through your local extension service is the most reliable option and often costs little. A home kit is a quick screening tool for pH and the main nutrients, and some gardeners use one for between-lab checks.

Luster Leaf Rapitest Soil Test Kit
A colour-comparison kit that checks pH, nitrogen, phosphorus and potash. It is a screening tool, not a lab analysis, so treat the readings as a guide. It will not tell you your organic matter percentage, so for precise numbers use an extension lab. The kit is most useful for quick before-and-after checks on several beds.
View on Amazon →How to Start a No-Till Bed This Fall
The method most extension services teach for creating a new bed without digging is sheet mulching, sometimes called lasagna gardening. Oregon State University describes it as layering cardboard, newspaper or heavy paper over the soil to smother weeds and weed seeds by denying them light. Penn State Extension adds that the layers can turn lawn into any kind of bed, from vegetables to perennials, and that winter is a good time to let the bed rest.

- Mark the bed and mow or cut the growth low. Leave the cut material in place.
- Lay plain brown cardboard, overlapping the edges. OSU says to use plain brown corrugated cardboard, not shiny or printed, and to remove tape and staples. The RHS likewise advises against glossy cardboard.
- Wet it thoroughly. This holds it down and starts it breaking down. OSU notes you may need rocks or stakes to hold it if you cannot cover it right away.
- Add compost, then mulch. To plant straight away, OSU says you can sift a 2 to 3 inch layer of compost or garden soil on top and plant into it. To let the bed mature, build thicker layers and wait. Extension experts quoted by Piedmont Master Gardeners suggest up to 6 inches of mulch for best weed suppression.
- Wait or plant. Penn State suggests a few months of rest before planting, which fits a fall start for a spring bed. Vary the depth to the crop: more for vegetables and annuals, less for plants that prefer lean soil.

OSU cautions that sheet mulching does not suit every site and tells readers to check with their local extension office. If you are replacing a lawn, see our guides to killing lawn weeds without glyphosate and turning part of your lawn into a wildflower meadow for related ways to remove turf without digging.
Cover Crops as an Alternative
If you would rather grow your soil cover than buy it, cover crops are the other no-till tool. Piedmont Master Gardeners note that cover crops add roots that loosen the soil, while mulch adds protection and organic matter but not living roots. Iowa State University Extension lists benefits including improved soil fertility, weed suppression and reduced compaction.

- Choose one that winter-kills if you can. Iowa State says that for most home gardeners a winter-killing cover crop is the easiest to manage. Cereal rye and crimson clover often survive winter and need active termination.
- Terminate on time. Iowa State recommends terminating 2 to 3 weeks before planting vegetables, and Oklahoma State Extension says 2 to 4 weeks, to give residues time to break down.
- No-till termination options. Iowa State lists winter kill, mowing, crimping and smothering with an opaque cover for various species, alongside tillage and herbicide.
- Watch the calendar. Seed sellers advise sowing crimson clover about 6 to 8 weeks before the first fall frost. If that window has passed, Botanical Interests notes it also grows in cool spring weather, so a spring sowing is an option.
- Legumes may need an inoculant. Oklahoma State advises checking whether a legume species recommends one. This is the nitrogen-fixing bacteria type, which is a different product from the mycorrhizal inoculants above.
We have left cover crop seed out of the product list because the right species depends heavily on your region and sowing date. Your local extension office can tell you what suits your climate.
Hand Tools for Compacted Ground
Strictly speaking, a no-dig purist does not loosen soil at all. Oregon State's home-garden guidance, however, includes loosening the soil with a digging fork to improve aeration, particularly when converting an existing garden. A broadfork takes the same approach on a wider scale: you push the tines in, rock the handles back, and the soil lifts and cracks without being turned over.


Tabor Tools Digging Fork
For one or two beds, a sturdy digging fork is all you need to open up compacted ground before mulching. A product roundup from Bob Vila picks this all-steel fork as its best overall, listing a 40 inch length and about 5.5 pounds. Work it in gently and lift rather than turn.
View on Amazon →
Bully Tools Broad Fork
A five-tine steel broadfork with fiberglass handles, better suited to larger plots than a single raised bed. The maker describes 10-gauge steel tines and a limited lifetime warranty (manufacturer claims, not independent testing). It is heavy, and a bed that is already loose and mulched does not need it, so buy it only if compaction is a real problem across several beds.
View on Amazon →A Year in a No-Till Bed

| When | What to do |
|---|---|
| Fall | Test soil. Start new beds with cardboard, compost and mulch. Add shredded leaves to existing beds. |
| Winter | Leave the cover on. Keep an eye on mulch for rodents near food and water. |
| Early spring | Pull mulch back so the sun can warm the soil (OSU). Top up with about 2 inches of compost (RHS). |
| Planting time | For transplants, open a hole through the mulch with a trowel. For seed, pull the mulch back and smooth the surface with a rake (OSU). |
| After seedlings establish | Re-apply a thin mulch to suppress weeds and protect the soil (OSU). |
| Summer | Keep the soil covered. Check for slugs in damp spells. |
| Every 3 to 5 years | Retest soil. More often if you amend heavily (Illinois Extension). |
Track Your Soil Tests, Products and Seasonal Jobs
A no-till bed pays off over seasons, so the hard part is remembering what you did and when. The Gardensted Lawn Care Planner is a 46-page printable PDF with a soil test record, a log of every product you use, seasonal checklists, a budget and shopping list, equipment maintenance pages and a year-end review. Its monthly pages and guides are written for lawns, so use the record-keeping pages for your beds and the lawn guides for the grass around them.
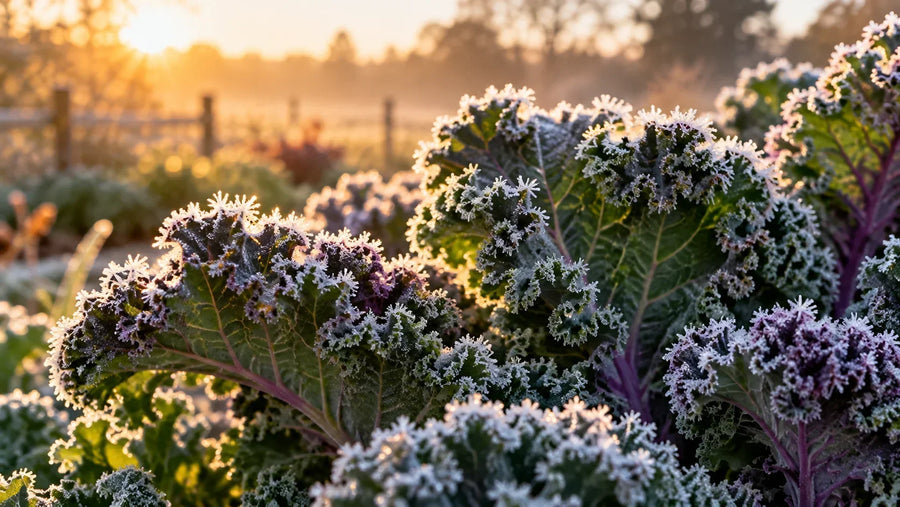
Get the Lawn Care Planner — $19.99Frost arrives alongside the fall start, so mulching and bed protection overlap. Our guide to protecting your garden from the first frost covers the cold-weather side. If you grow in raised beds, our piece on elevated metal raised beds shows bed options that are easy to keep mulched and out of foot traffic.
Common Mistakes
- Skipping the soil test. University extension services recommend testing before you add lime, fertilizer or other amendments, because guessing can waste money and throw pH off.
- Using shiny or printed cardboard. OSU and the RHS both advise plain brown corrugated cardboard.
- Leaving cardboard dry or uncovered. Wet it and cover it, or it blows away and breaks down slowly.
- Relying on fresh straw or hay alone. UC Extension says these can tie up soil nitrogen as they decompose, so compost first or add nitrogen where they touch the soil.
- Walking on the bed. Nebraska Extension recommends narrow beds so you never need to step in them.
- Buying an inoculant before fixing the basics. UConn suggests improving soil conditions first.
- Converting everything at once. The RHS says you do not have to go no-dig everywhere if you lack the material.
- Expecting instant results. Soil improves over seasons, not weeks.
US and UK Differences
In the UK, no-dig is the more common name, and the RHS has a dedicated advice guide. It recommends an annual mulch of around 5 cm of compost and prefers home-made compost over bought-in material for environmental reasons. The RHS also notes that studies have found spreading mulch in autumn can waste nitrogen, even with home-made compost. In a wet climate, that argues for timing your main compost mulch for late winter or early spring and using cardboard and a light cover in fall. Garden writers citing the RHS suggest late winter as a good time to begin.
In the US, the climate range is wide, so local advice matters more. OSU's guidance reflects the Pacific Northwest, Iowa State and Michigan State speak to the Midwest, and Oklahoma State to the south-central states. Cover crop choices, termination timing and whether mulch should stay on through spring all shift with your hardiness zone and rainfall. Your county extension office is the best source for dates.
No-Till Starter Checklist
- Send off or run a soil test and note your pH
- Find your compost source: home bin, municipal program, or bagged
- Collect plain brown cardboard and remove tape and staples
- Gather mulch: leaves, straw, grass clippings or aged manure
- Start with one or two beds
- Pull mulch back in early spring before planting
- Retest in three to five years
FAQ
Is no-till the same as no-dig?
Essentially yes. The RHS uses "no-dig" and describes it as avoiding breaking up, lifting or turning the soil. In the US the same practice is usually called no-till.
Do I need to loosen the soil first?
Not always. OSU suggests loosening with a digging fork to improve aeration, which helps on compacted ground. The RHS says plants can root directly into the soil beneath ground-level beds.
How long before I see results?
Extension sources describe a gradual build-up of organic matter, soil life and structure rather than a fixed timetable. Expect improvement across seasons.
Can I plant straight away after sheet mulching?
OSU says you can sift a 2 to 3 inch layer of compost or garden soil over the cardboard and plant directly. Penn State suggests letting the bed rest for a few months if you can, which suits a fall start.
What is the best mulch?
OSU lists straw, compost, aged livestock manure, dried leaves and grass clippings. Use what you can get cheaply and locally. Fresh straw and hay can use soil nitrogen as they decompose, according to UC Extension.
Do I have to buy compost?
No. The RHS prefers home-made compost, and University of Illinois Extension notes that municipal composting programs are another source. Bagged compost is useful for small areas and top-ups.
Final Takeaway
Start small. Test your soil this fall, lay cardboard and compost on one bed, keep it covered, and stay off it. Buy compost and a few hand tools if you need them, and skip products that promise to "activate" soil without evidence. Check your local extension office for dates and for any rules that apply to your region.
Product Summary
Every product below also appears in the article above. We have not tested any of them.
| Product | Best For | Why It Fits This Article | Key Feature to Look For | Amazon |
|---|---|---|---|---|
| Espoma Organic Land & Sea Gourmet Compost | Small beds and top-dressing | Compost is the main input for a no-till bed | Bag volume, to match your bed area | View on Amazon |
| Luster Leaf Rapitest Soil Test Kit | Quick pH and nutrient screening | Gives a starting point before adding amendments | Colour-comparison pH, N, P and K tests | View on Amazon |
| Tabor Tools Digging Fork | Loosening compacted ground in a few beds | Extension guidance suggests forking to improve aeration | All-steel construction, 40 inch length | View on Amazon |
| Bully Tools Broad Fork | Larger plots with compaction | Lifts and loosens soil without turning it over | Steel tines, fiberglass handles | View on Amazon |

0 comments