

10 Easy DIY Garden Projects You Can Finish in a Weekend
Most garden improvements feel bigger than they actually are. You look at a bare corner, a tangle of hoses by the back door, or a fence line that's needed attention since spring, and your brain files it under "someday project" — something that needs a whole free weekend, a truckload of materials, and a plan you don't have time to make.
Usually that's not true. Most gardens that look put-together weren't done in one big push. They were built one weekend at a time, one specific problem solved at a go.
These ten projects were chosen for range, not just ease: a support for climbing plants, somewhere to actually put your tools, somewhere to sit, some light in the evening, a planter, a refreshed fence, herbs by the back door, free water, and a path across the lawn. Some genuinely take an afternoon. A couple need a full weekend, and one or two will eat into a second one if the weather doesn't cooperate. I've tried to be honest about which is which.
A note on timing: "weekend project" here means the build — not necessarily everything around it. Concrete needs to cure. Paint needs to dry between coats. Build the structure this weekend; let the finishing touches follow their own schedule. Measurements are given in both imperial and metric throughout, since growing seasons, frost dates, and material availability differ between the US and UK.
Disclosure: This article contains Amazon affiliate links. If you purchase through these links, Gardensted may earn a commission at no additional cost to you.
As an Amazon Associate, Gardensted earns from qualifying purchases.
- 10 genuinely distinct DIY garden projects, each with a photo
- Honest difficulty ratings and realistic time estimates for each
- What to prepare, and what commonly gets underestimated
- How to choose the right project for the weekend you actually have
- The most common DIY garden mistakes, and how to avoid them
- 1. Simple A-Frame Trellis
- 2. Reclaimed Potting Bench
- 3. Tool Storage Pegboard Wall
- 4. Simple Corner Bench Seat
- 5. Solar Pathway Lighting
- 6. Statement Planter from a Reclaimed Container
- 7. Refresh Garden Fencing
- 8. Simple Vertical Herb Planter
- 9. Rainwater Collection Barrel
- 10. Simple Stepping-Stone Path
- How to Choose the Right Project
- Mistakes to Avoid
- Amazon Products Mentioned

1 Build a Simple A-Frame Trellis
- What you're making
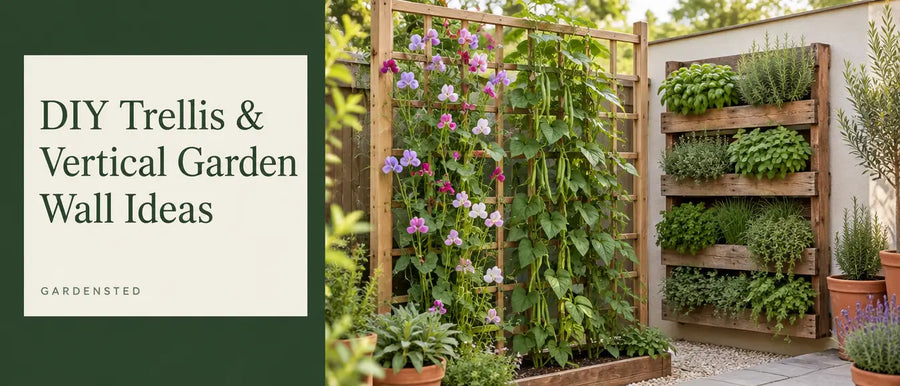
- A freestanding, triangular trellis for climbing plants like sweet peas, clematis, or climbing beans.
- Why it's useful
- An A-frame doesn't need to lean against anything, so it works in open borders and vegetable beds alike, and it gives you vertical growing space without eating into ground area.
- What you need
- Four to six lengths of untreated timber batten (roughly 1.5 x 1.5 inches / 4 x 4 cm), exterior-grade screws or wire ties, and either wire mesh, garden twine, or trellis netting for the climbing surface.
- Tools
- Saw, drill, tape measure.
- How to do it
- Cut two matching sets of legs, join them at the top in an inverted V on each side, then connect the two triangles with a ridge piece so the whole thing stands on its own. Attach your climbing surface across one or both faces. Push the legs into the soil a few inches for stability, or peg them if the bed is shallow.

2 Build a Simple Potting Bench from Reclaimed Materials
- What you're making
- A waist-height work surface for potting, sowing, and general garden tasks.
- Why it's useful
- Potting on the ground or on a wobbly table is the kind of small daily friction that adds up — a proper surface at the right height makes routine tasks faster and less back-breaking.
- What you need
- A sturdy tabletop (reclaimed timber, an old cabinet, or a simple built frame), legs or a base structure, optional shelf underneath.
- Tools
- Saw, drill, screws.
- How to do it
- If you're building from scratch, keep the design simple: four legs, a worktop, a lower shelf for compost bags and pots. Height should sit around hip level so you're not stooping. If you're repurposing an old piece of furniture, the main job is reinforcing joints and adding a weatherproof finish.

3 Organize a Garden Tool Storage Wall
- What you're making
- A dedicated wall or panel in a shed, garage, or outdoor storage area with hooks, brackets, and racks for hand tools.
- Why it's useful
- Tools that live in a pile get lost, damaged, and left out in the rain. A wall system means everything has a place and takes seconds to put away.
- What you need
- A pegboard or slatted tool panel, assorted hooks, brackets, and rail systems sized to your actual tools.
- Tools
- Drill, screws, wall anchors if mounting to masonry.
- How to do it
- Lay your tools out on the ground first to plan spacing before mounting anything — it's much easier to rearrange on the floor than to move screw holes. Group by type: long-handled tools on one section, hand tools on another.

DEWALT 20V MAX Cordless Drill and Impact Driver Combo Kit
Several projects in this guide lean on the same basic tool: a cordless drill/driver. This kit pairs a compact drill/driver with an impact driver, includes two batteries and a charger, and is compact enough to use in tight corners like a shed or behind a bench frame.
Check it on Amazon →
Wall Control Metal Pegboard Organizer Kit
If you're starting from scratch rather than repurposing an offcut of board, a purpose-made metal pegboard kit saves a lot of trial and error. The galvanized panel and slotted hook system hold garden tools securely without hooks popping out under weight, a common complaint with basic hardboard pegboard.
Check it on Amazon →
4 Build a Simple Corner Bench Seat
- What you're making
- A basic timber bench sized to fit an underused corner of the patio or garden.
- Why it's useful
- Odd corners often go unused simply because there's nowhere to sit in them — a bench turns dead space into a spot people actually use.
- What you need
- Timber for the frame and seat slats, exterior screws, wood finish or sealant.
- Tools
- Saw, drill, spirit level.
- How to do it
- Build a simple box frame at a comfortable seat height (roughly 17–18 inches / 43–46 cm), then attach seat slats across the top with small gaps for drainage. Add a backrest if the design allows it — it changes the bench from a perch to somewhere people will actually sit for a while.

5 Add Simple Solar Garden Lighting
- What you're making
- A lit pathway, seating area, or planting bed using solar stake lights.
- Why it's useful
- Lighting extends how much of the evening you actually use the garden, and solar kits avoid any mains electrical work.
- What you need
- Solar path lights.
- How to do it
- Plan the layout before installing anything — walk the space at dusk and note where light is actually useful, rather than spacing lights evenly for the sake of it. Push solar stakes into soil where they'll get reasonable daylight exposure; shaded spots undercharge and dim quickly.

GIGALUMI Solar Pathway Lights (Multi-Pack)
For a straightforward path or border, a multi-pack of solar stake lights is the easiest starting point since there's no wiring at all. Reviewers are mixed on brightness for very dark paths where safety lighting matters, so treat these as accent lighting for a border or patio edge rather than the sole light source for a steep or uneven path at night.
Check it on Amazon →
6 Make a Statement Planter from a Reclaimed Container
- What you're making
- A large, eye-catching planter from a repurposed object — an old trough, barrel, tin bath, or similar.
- Why it's useful
- A single well-placed large planter often does more visually than several small ones scattered around, and reclaimed containers have character new plastic pots don't.
- What you need
- The container itself, drainage material (broken crocks or gravel), potting compost, plants suited to the container's size and your site's light.
- Tools
- Drill (for adding drainage holes if needed).
- How to do it
- Drill drainage holes if the container doesn't already have them — this step isn't optional for anything holding live plants. Add a layer of drainage material, then compost, then plant.

7 Paint or Refresh Garden Fencing
- What you're making
- Not new fencing — a color refresh on existing panels using exterior stain or a combined stain-and-sealer.
- Why it's useful
- Fence color has an outsized effect on how a whole garden reads, and it's one of the cheapest transformations relative to the visual impact.
- What you need
- Exterior stain or sealer, brushes, a roller, or a sprayer, dust sheets to protect nearby planting.
- How to do it
- Clean and dry the fence first — a finish applied over dirt or algae won't hold. Protect nearby plants before you start, then work in sections, following the product's recommended coverage and drying times.

Ready Seal Natural Cedar Exterior Stain & Sealer (1 Gallon)
A semi-transparent, oil-based stain and sealer in one, meant to go straight onto bare or lightly weathered wood without a separate primer. It's formulated to avoid lap marks and streaking, which matters on a fence where you're often working alone. It reaches its true color after roughly two weeks as it cures.
Check it on Amazon →
8 Build a Simple Vertical Herb Planter
- What you're making
- A wall-mounted or freestanding vertical planting system for herbs, using stacked containers, a pallet, or a purpose-built frame.
- Why it's useful
- Herbs are ideal for vertical growing — shallow-rooted, fast-growing, and useful right by the kitchen door.
- What you need
- A pallet or timber frame, landscape fabric (if using a pallet), small pots or planting pockets, potting compost, herb plants.
- Tools
- Staple gun (for fabric), drill.
- How to do it
- If building from a pallet, line the back and sides with landscape fabric stapled securely in place to hold soil, stand it upright, and plant into the front gaps. Water carefully and evenly — vertical planters dry out faster than ground beds.

9 Set Up a Simple Rainwater Collection Barrel
- What you're making
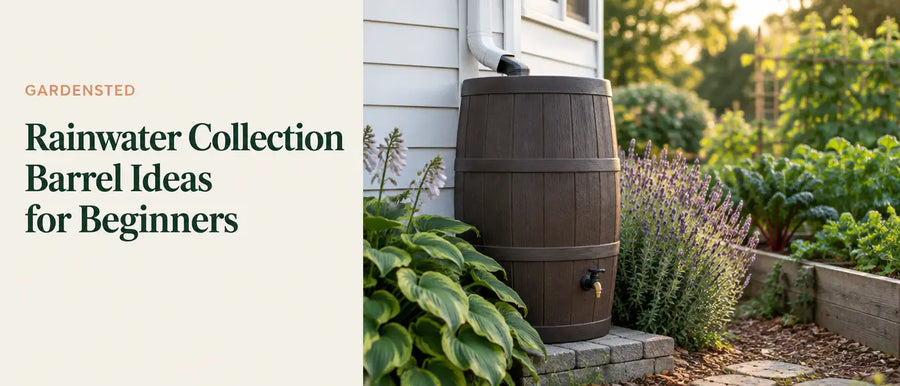
- A water butt connected to a downpipe from a shed, garage, or house roof, for collecting rainwater to use on the garden.
- Why it's useful
- Free water for the garden, and reduced runoff — a genuinely useful weekend project rather than a purely decorative one.
- What you need
- A water butt (with tap), a diverter kit sized to your downpipe, a stand or base to raise the butt for easier access under the tap.
- Tools
- Diverter-cutting tool (often included in diverter kits), drill.
- How to do it
- Follow the diverter kit's instructions for cutting into the downpipe — most modern kits are designed for straightforward DIY installation. Raise the butt on a stand so a watering can fits comfortably under the tap.

EarthMinded Rain Barrel Diverter Kit
EarthMinded is one of the more established names in this category, and the kit is designed to let you connect a standard rectangular downspout to a barrel without removing or shortening the downspout itself. Some reviewers note that in very heavy rain, water can find its way around the seal if the barrel is already full, so it's worth checking the fit during the first few rainfalls.
Check it on Amazon →
10 Build a Simple Stepping-Stone Path
- What you're making
- A short, informal path across lawn or a border using individual stepping stones — not a full paved path.
- Why it's useful
- A stepping-stone path is a genuinely realistic weekend project, unlike a full permanent path, which usually needs excavation, a proper sub-base, and considerably more time.
- What you need
- Paving slabs or stepping stones, sand or gravel for bedding, a spade.
- How to do it
- Lay the stones out first and walk the route to check spacing feels natural before cutting any turf. Cut around each stone, remove enough soil to bed it level with a thin layer of sand or gravel underneath, and firm each one in place.
How to Choose the Right Weekend Garden Project
With ten options, the harder question isn't finding a project — it's picking the right one for this particular weekend. Work through these before you buy anything:
- What problem are you actually trying to solve? A messy tool corner and an empty border need completely different projects.
- How much time do you genuinely have? Be honest about interruptions and how the light changes as the day goes on.
- What tools do you already own? A project that needs a tool you don't have adds a shopping trip before you've started.
- What materials are readily available nearby? Reclaimed materials are often cheaper but take longer to source.
- How much physical work is involved? Pick a lighter project if you're working alone or recovering from anything.
- Does the weather matter to this project? Painting and sealing depend on dry conditions — check the forecast.
- Does the project need drying or curing time? Plan for that time to fall after your build day, not during it.
- Will the result need ongoing maintenance? A planted screen needs watering; a timber structure needs periodic resealing.
- Is it genuinely within your skill level? Confidence and a completed job beat an ambitious half-finished one.
- Does any part of it need professional help? Electrical work and anything touching utilities are worth a second opinion.
10 DIY Garden Mistakes to Avoid
Before buying timber or paving, measure the space twice and sketch the project on paper. A five-minute sketch can prevent an expensive trip back to the store.
Amazon Products Mentioned in This Guide
| Product | Best For | Why It Fits | Key Feature to Look For | Amazon |
|---|---|---|---|---|
| DEWALT DCK240C2 Cordless Drill & Impact Driver Combo Kit | General tool ownership across several projects | Covers drilling and driving needs for trellises, benches, and pegboard mounting | Two-speed drill plus separate impact driver; two batteries and a charger included | View on Amazon |
| Wall Control Metal Pegboard Organizer Kit | Project 3 — tool storage wall | Purpose-built metal pegboard holds garden tools more securely than basic hardboard pegboard | Slotted metal panel accepts standard 1/4" pegboard hooks plus Wall Control accessories | View on Amazon |
| GIGALUMI Solar Pathway Lights | Project 5 — solar lighting | Fully solar stake lights need no wiring, fitting a true weekend timeline | Auto on/off at dusk; waterproof housing for outdoor stake mounting | View on Amazon |
| Ready Seal Natural Cedar Exterior Stain & Sealer (1 Gallon) | Project 7 — fencing | Combined stain-and-sealer with no back-brushing needed suits an unassisted weekend job | No-primer, no-lap-mark formula; reaches true color after roughly two weeks curing | View on Amazon |
| EarthMinded Rain Barrel Diverter Kit | Project 9 — rainwater collection | Established, purpose-built diverter designed for a no-dismantle downspout install | FlexiFit diverter design fits standard rectangular downspouts without removing them | View on Amazon |
Gardensted Takeaway
You don't need a free month to make a real dent in your garden — you need one clearly defined problem, a realistic project matched to the time and skill you actually have, and a willingness to finish the small details that make a build look intentional rather than improvised. Pick one project from this list, work through the ten questions above before you buy materials, and treat the mistakes section as a pre-flight check rather than a list to read after something's gone wrong.
0 comments